There are two types of users that use DeBounce in order to validate their email addresses. First, users that have only a list of emails in a .txt file without any other information about the email owner, and second, users that have an excel file containing extra columns such as First name, Last name, Location, Register Date, and more. In both cases, users can use DeBounce to validate their emails. But, there will be a question in the second case: DeBounce only accepts .txt files, how should the user validate a list containing extra columns like names?
In this article, we have provided a step-by-step guide to help you how to add DeBounce validation results into your original file.
How to add DeBounce validation results into your original file
Follow these steps:
1. Should you remove duplicated rows or not?
First of all, you should check if your excel file contains duplicated rows. This is important because DeBounce removes duplicated emails by default. In order to match DeBounce results with your original file, the number of rows on both files must be the same. If your excel file contains duplicated rows, you must decide to remove duplicated rows from your excel file or not? In case you remove duplicated rows from the original excel file and upload them on DeBounce, the validation results and original excel file will have the same number of rows. In case you do not remove duplicated rows, you need to turn the de-duplication feature off in DeBounce settings, so the number of rows becomes the same after validation on both files.
How to remove duplicated rows in MS Excel?
- Select the column that contains your emails.
- Go to DATA tab.
- Click on “Remove Duplicates”.
- On the opened dialog, check for “Expand the Selection” and press “Remove Duplicates”.
- On the next page, un-check all columns and only select the column which contains email addresses. Then press OK.
How to turn the de-duplication feature off on DeBounce?
- Login to your dashboard.
- Hover on “Account Options” and click on “Settings”.
- On “DeDuplication Feature” section, uncheck this option and click on Update.
2. Start email validation process
After deciding whether to remove duplicated rows on your original file or turn off the de-duplication feature on DeBounce, you need to validate your emails now. In order to prepare your file for validation, you need to convert your emails into a .txt file suitable to upload on DeBounce. We have prepared a detailed article containing step-by-step guides that help you create a .txt file on different operating systems: How can I create a plain text (.txt) file suitable for uploading into DeBounce?
3. Adding DeBounce results into your original file
When email validation is completed, download the results. DeBounce does not change the order of your emails. So, the order of emails on both original CSV and email validation results should be the same. All you need is to copy/paste the “Result” and “Reason” columns from the report into your original CSV or Excel file.
DeBounce does not change the order of your emails. All you need is to copy/paste “Result” and “Reason” columns from the report into your original CSV file.
4. Filtering and analyzing the results
That is all. Now you can filter different rows based on your needs and analysis. To filter email validation results, follow these steps:
- Open the excel file you have created from previous steps.
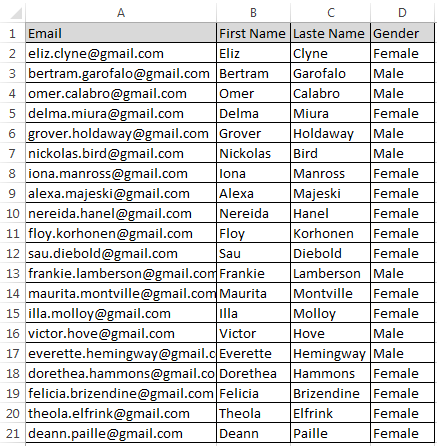
- Select first row of the excel file which include headers such as “First Name”, “Email”, “Result” and more.
- Select the Data tab, then locate the Sort & Filter group.
- Click the Filter command.
- Drop-down arrows will appear in the header of each column.
- Click the drop-down arrow for the column you want to filter. For example, try to filter the Result column to view only certain types of emails.
- The Filter menu appears.
- Uncheck the boxes next to the data you don’t want to view, or uncheck the box next to Select All to quickly uncheck all.
- Check the boxes next to the data you do want to view. In this example, please check “Safe to Send” to view only these types of email.
- Click OK. All other data will be filtered, or temporarily hidden. Only Deliverable emails will be visible.
- Filtering options can also be found on the Home tab, condensed into the Sort & Filter command.